Aug 12, 2018

Ionic 4 Working With Modal Popup


In this article I'm going to show you guys, how we can open a Modal Popup in an Ionic Application and How we can pass values to that popup.

Lets start it with a Ionic Blank Application. 


1
Ionic start AppModal blank

This is the current folder hierarchy.


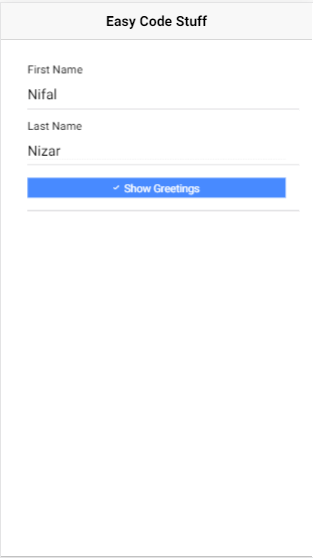
Now lets add a text field and button to home screen. The text we enter to the text field will pass to the Modal Popup when we click the button. Lets  add this simple html code to create the UI. I have button click event "onShowGreetingsClicked()" to open the popup.


home.html
 1
 2
 3
 4
 5
 6
 7
 8
 9
10
11
12
13
14
15
16
17
18
19
20
21
22
23
24
25
26
<ion-header>
  <ion-navbar>
    <ion-title>
      Easy Code Stuff
    </ion-title>
  </ion-navbar>
</ion-header>

<ion-content padding>
  <ion-item>
    <ion-label floating>
      First Name
    </ion-label>
    <ion-input type="text" [(ngModel)]="firstName"></ion-input>
  </ion-item>
  <ion-item>
    <ion-label floating>
      Last Name
    </ion-label>
    <ion-input type="text" [(ngModel)]="lastName"></ion-input>
  </ion-item>
  <ion-item>
    <button ion-button full color="primary" type="button" (click)="onShowGreetingsClicked()">
      <ion-icon name="checkmark"></ion-icon>&nbsp;&nbsp;Show Greetings</button>
  </ion-item>
</ion-content>


home.ts
 1
 2
 3
 4
 5
 6
 7
 8
 9
10
11
12
13
14
15
16
17
18
19
20
21
import { Component } from '@angular/core';
import { NavController } from 'ionic-angular';

@Component({
  selector: 'page-home',
  templateUrl: 'home.html'
})
export class HomePage {

  firstName: string = '';
  lastName: string = '';

  constructor(public navCtrl: NavController) {

  }

  onShowGreetingsClicked(): void {
    console.log('clicked');
  }

}


Lets see how out application looks like using below command. 


1
Ionic Serve


Now lets add Page Called ModalGreeting using Ionic CLI.


1
ionic generate page ModalGreeting --no-module


Now this is the current folder hierarchy.


This is the sample code I'm getting it when I generate the page form Ionic CLI.

modal-greeting.html
 1
 2
 3
 4
 5
 6
 7
 8
 9
10
11
<ion-header>

  <ion-navbar>
    <ion-title>ModalGreeting</ion-title>
  </ion-navbar>

</ion-header>

<ion-content padding>

</ion-content>


modal-greeting.ts

 1
 2
 3
 4
 5
 6
 7
 8
 9
10
11
12
13
14
15
16
17
import { Component } from '@angular/core';
import { NavController, NavParams } from 'ionic-angular';

@Component({
  selector: 'page-modal-greeting',
  templateUrl: 'modal-greeting.html',
})
export class ModalGreetingPage {

  constructor(public navCtrl: NavController, public navParams: NavParams) {
  }

  ionViewDidLoad() {
    console.log('ionViewDidLoad ModalGreetingPage');
  }

}


Now lets pass the First Name and Last Name values to the Modal Popup and show it when we click the button.

Now lets see how our final code looks like.


app-module.ts
 1
 2
 3
 4
 5
 6
 7
 8
 9
10
11
12
13
14
15
16
17
18
19
20
21
22
23
24
25
26
27
28
29
30
31
32
33
import { BrowserModule } from '@angular/platform-browser';
import { ErrorHandler, NgModule } from '@angular/core';
import { IonicApp, IonicErrorHandler, IonicModule } from 'ionic-angular';
import { SplashScreen } from '@ionic-native/splash-screen';
import { StatusBar } from '@ionic-native/status-bar';

import { MyApp } from './app.component';
import { HomePage } from '../pages/home/home';
import { ModalGreetingPage } from '../pages/modal-greeting/modal-greeting';

@NgModule({
  declarations: [
    MyApp,
    HomePage,
    ModalGreetingPage
  ],
  imports: [
    BrowserModule,
    IonicModule.forRoot(MyApp)
  ],
  bootstrap: [IonicApp],
  entryComponents: [
    MyApp,
    HomePage,
    ModalGreetingPage
  ],
  providers: [
    StatusBar,
    SplashScreen,
    {provide: ErrorHandler, useClass: IonicErrorHandler}
  ]
})
export class AppModule {}

home.html
 1
 2
 3
 4
 5
 6
 7
 8
 9
10
11
12
13
14
15
16
17
18
19
20
21
22
23
24
25
26
<ion-header>
  <ion-navbar>
    <ion-title>
      Easy Code Stuff
    </ion-title>
  </ion-navbar>
</ion-header>

<ion-content padding>
  <ion-item>
    <ion-label floating>
      First Name
    </ion-label>
    <ion-input type="text" [(ngModel)]="firstName"></ion-input>
  </ion-item>
  <ion-item>
    <ion-label floating>
      Last Name
    </ion-label>
    <ion-input type="text" [(ngModel)]="lastName"></ion-input>
  </ion-item>
  <ion-item>
    <button ion-button full color="primary" type="button" (click)="onShowGreetingsClicked()">
      <ion-icon name="checkmark"></ion-icon>&nbsp;&nbsp;Show Greetings</button>
  </ion-item>
</ion-content>


home.ts
 1
 2
 3
 4
 5
 6
 7
 8
 9
10
11
12
13
14
15
16
17
18
19
20
21
22
23
24
25
26
27
import { Component } from '@angular/core';
import { NavController, NavParams, ModalController } from "ionic-angular";
import { ModalGreetingPage } from '../modal-greeting/modal-greeting';

@Component({
  selector: 'page-home',
  templateUrl: 'home.html'
})
export class HomePage {

  firstName: string = '';
  lastName: string = '';

  constructor(
    public navCtrl: NavController,
    public navParams: NavParams,
    public modalCtrl: ModalController
  ) {

  }

  onShowGreetingsClicked(): void {
    let modal = this.modalCtrl.create(ModalGreetingPage, {firstName: this.firstName, lastName: this.lastName});
    modal.present();
  }

}


modal-greeting.html
 1
 2
 3
 4
 5
 6
 7
 8
 9
10
11
<ion-header>

  <ion-navbar>
    <ion-title>Easy Code Stuff Greeting</ion-title>
  </ion-navbar>

</ion-header>

<ion-content padding>
  Hello {{firstName}} {{lastName}}
</ion-content>


modal-greeting.ts
 1
 2
 3
 4
 5
 6
 7
 8
 9
10
11
12
13
14
15
16
17
18
19
20
21
import { Component } from '@angular/core';
import { NavController, NavParams } from 'ionic-angular';

@Component({
  selector: 'page-modal-greeting',
  templateUrl: 'modal-greeting.html',
})
export class ModalGreetingPage {
  firstName: string = '';
  lastName: string = '';

  constructor(public navCtrl: NavController, public navParams: NavParams) {
    this.firstName = navParams.get("firstName");
    this.lastName = navParams.get("lastName");
  }

  ionViewDidLoad() {
    console.log('ionViewDidLoad ModalGreetingPage');
  }

}


Now lets see how our application looks like.


Hope you follow it up. See you again on next article.

Running Ionic 4 Application On Android Device

Hi Guys, hope you all followed my previous article about Getting Started With Ionic. Lets see how we can test this simple application in an Android Device.

First of all what you have to do is setup the environment. 

Step 1 : Install Java Development Kit. I have an bit old article about setting up the java environment.


Step 2 : We should install the Android SDK. You can simply download and install Android Studio.


Step 3 : In order to test and configure it on Android Device, you may need to configure Gradle Daemon. Without going into much details or over confusing you can simple achieve this by creating a sample android project in Android Studio and adding few target SDks.


Step 4 : Run the below command to add the android platform.


1
ionic cordova platform add android

This command will take few minutes depending on your internet connection. if everything goes correct you will get below output.


Step 5 : Lets build it for Android using below command.


1
ionic cordova build android

If everything goes correct you will get below output.


Step 6 : That's all you have to do. Copy the APK file to Mobile Device from the folder location shown in the output. 


Step 7 : Click on the APK file in the mobile device. You will get the below message, because we are trying install an APK which is not fully trusted APK with google agreements. For now we only need to run this on our device. In my case I'm trying it on my Samsung Galaxy S6.


Step 8 : Click Settings.


Step 9 : Then click on the Unknown Source Toggle button.


Step 10 : Then press OK


Step 11 : Then Press Install


If everything went well you will get the following message.


Step 12 : Then click open. You will see your application in mobile.


Hope you follow it up. Read my next article about Working With Ionic Modal Popup.

Getting Started With Ionic 4

In this article I will be covering a series of articles for you to develop an Ionic Application and Publish it Google Play Store. The current version of Ionic is 4. Lets get started with Hybrid Mobile Application using Ionic. Hope you know what is Ionic and how it works. First of all you need to setup the environment for IONIC development.

Step 1 : Install latest version of Node if you have not installed. You can check your node version using below command in CMD.

1
node -v

Step 2 : Download a code editor for development. I use VS Code. Which is an open source code editor.

Step 3 : Install Ionic CLI globally using below command.


1
npm install -g ionic@latest

Step 4 : Lets create an Ionic App now. There are 3 main options while creating an Ionic Application.
You can create either Blank Application or Tabs Application or Side Menu Application. First Lets create Side Menu Application using below command.


1
ionic start SideMenuApp sidemenu

When you execute this command you will get something like this.


Its basically asking you if you want to create a mobile application (android and/or iOS). If that's your intention, then hit the y key, followed by enter. It will then ask you which platforms you want to install, type a platform name from the options and hit the enter key again.

If your intent is not to create a mobile app, then hit the n key, followed by enter and you'll be on your way to developing a single page, mobile first application.

So lets Enter "N" and Proceed.

Step 5 : Go to your newly created folder and run the Application using below commands.


1
2
cd SideMenuApp
ionic serve

You will see get the following output in the Command Prompt.


Then application will open in the browser.


Hope you follow it up. Lets see how we can run this on a device in my next article.

Auto Center The Marker With Map Dragging

We used Google Map a lot in our applications. Sometimes in our applications we need select a location from google map. where we can drag the map as well as the marker. I came cross an issue, where I drag the map to select a location which I want, but marker is not responding with that. In order to update the marker with map drag event, we can get the google maps center position and set that to the marker. So when ever we drag the map, marker will auto come to the center of the map. After that we can drag marker as we want.

The below code is an example to do that.


 1
 2
 3
 4
 5
 6
 7
 8
 9
10
11
12
13
14
15
16
17
18
19
20
21
22
23
24
25
26
27
28
29
30
31
32
33
34
35
36
37
38
39
40
<html>
<head>
    <title>Google Map Auto Center The Marker</title>
    <script src="https://maps.googleapis.com/maps/api/js?sensor=false" type="text/javascript"></script>
</head>
<body>
    <div id="map-canvas" style="width:100%;height:500px;"></div>
    Latitude  : <input type="text" id="lat"/>
    Longitude  : <input type="text" id="lng"/>
 
    <script type="text/javascript">
        var lat = 6.929537;  //Your Location Latitude
        var lon = 79.866271; //Your Location Longitude
  
        //Setting Initial Latitide and Longitude
                                  
        document.getElementById("lat").value = lat;
        document.getElementById("lng").value = lon;
   
        var latlng = new google.maps.LatLng(lat, lon);
        var mapOptions = {
            center: latlng,
            zoom: 15
        };
        var map = new google.maps.Map(document.getElementById("map-canvas"), mapOptions);
        var marker = new google.maps.Marker({
            position: latlng,
            map: map
        });
  
 google.maps.event.addListener(self.map, "center_changed", function (event) {
    var center = map.getCenter();
    marker.setPosition(center);
        document.getElementById("lat").value = marker.getPosition().lat();
        document.getElementById("lng").value = marker.getPosition().lng();
         });

    </script>
</body>
</html>

JWT Token Decode Using Jquery

When it come to authentication we use many mechanism. Ones the user authenticated we must keep these details somewhere safe. So we can share...